
How to set up client groups for memberships (mobile)
In this article, you will learn how to create a group of clients for memberships through the partner Zoyya web application on mobile.
Client groups allow you to offer different prices of the same type of membership fee to different client groups, for example students, retirees or club members. Once you've created a group, you can assign clients to it and use it when pricing memberships.
PLATFORM_SWITCH: Desktop · Mobile
When to use this option?
Use this option when:
- you want to offer different memberships to different groups of clients
- you have student, child or pensioner memberships
- you want to grant special benefits to selected clients
- you sell the same membership fee model at different prices
Work steps
Creating a group
- Open the Main menu.
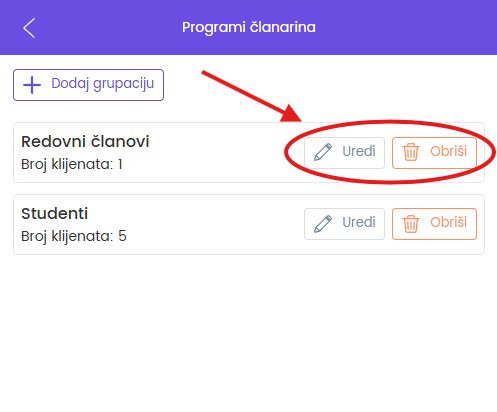
- Under Business, tap Settings, then under Membership settings, tap Client groups.
If you don't want to add clients right now, you can skip this step and do it later.
- Tap Save.
The group is now ready to use.
Frequently asked questions
Do I have to add clients to the group immediately?
No. You can create a group without adding clients and connect them later.
Can one client be in multiple groups?
No. A client can be assigned to only one group of memberships.
Will creating a group automatically change the memberships?
No. After creating a group, it is necessary to define the price for that group on the type of membership fee.
Can I later change the name of the group or add new clients?
Yes. You can edit the group at any time, add or remove clients and change its name.
Connected
Updated on: 21/08/2026
Thank you!